I want to say thanks to my two friends Bean and Martin as together we have made caves for the past couple of years. Many "cave nights" with trial and error of different techniques until we were happy with the out come of the caves.
I want to add this is what we did to save ourselves money and also enjoy the hobby a little more, in making the caves our fish breed in. I hope this helps you too.
I will post links for the clay we have used if it is requested.
Weaponry from the kitchen you will need to steal is as follows..
Cling film
Grease proof paper
Tall glass
Knife
Picture 1 shows the "cave moulds" (posh name for stollen rolling pin from the kitchen and two bits of wood from broom handles). Use a Stanley blade to make the end of the cave mould rounded off.
2. Wrap cling film over the cave mould. This will ensure the clay doesn't stick to cave mould.
3. Using a knife (stollen from the kitchen). Dip into the water and cut the desired amount of clay.
4. Get the clay into a ball and push down onto the cave mould, squeezing around the cave mould as you go.
5. Starting to take shape now. Make the cave to what ever length you want.
6. Final touches. Roll the cave over the grease proof paper. You will find that the cave will start to get tidier in appearance. The cave will come loose around the mould now. Dip the knife into the water and cut around the end (entrance to cave) to leave the clay with a smooth surface.
7-8. Pull the cave mould out slowly. You will be left with the cling film still in the cave.
9. Twist the cling film. This helps bring the clim film away from the cave. Note. Be gentle with cave at this point. Slowly pull out the cling film.
10. This picture shows what you'll be left with. Throw the cling film away.
11. The cave is done. At this point you can tweak it into a "D" or Triangle shape, whatever suits you.
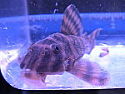
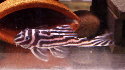
Place the cave on to a fresh bit of grease proof paper, where you can leave it to dry. It should take 7-10 days to dry properly and ready for the kiln. We pay our local potter to use his kiln to fire our caves. We prefer to have them fired when he has the kiln at the glazing temperature, which I think is about 1300 degrees but I could be wrong? Once fired and at home you will need to file off any sharp bits in and around the cave.
They're now ready to use.
Good luck and please let me know how you get on if you try it out. Have patience as it will take a few goes to get it right.
Ps. I hope you like the wall of children's art? 2 and 4