Step 1) Lay down 2.5 inches of larger sized gravel. This allows water to flow a bit and prevents anaerobic pockets. I am adding laterite in the photo. If I had a choice, I would use one of the new laterite substrates, but they are not available in Mexico.

Step 2) After the base substrate is down, add the first batch of sand.

Step 3) Start adding your rocks and/or driftwood. Be careful at this stage and take the time to try several arrangements. Have fun looking at different ways to place objects. You might want to arrange the wood and/or stones and leave it that way for a few days to see how you like it. Keep doing this until you are happy with the results.

Step 4) Once you are happy with the arrangement of the structure, add more sand. This is a very important step as structure that is just set on top of the substrate never looks natural. If the base of the stones or wood is partially buried it looks much more natural and the tank looks larger.

Step 5) Start attaching plants to the driftwood. Try to use the natural lines of the wood when placing the plants as this looks more natural. The Anubias below was gift from Jools and is a centerpiece for the tank.

Using the wood's natural nooks and crannys. The plants are held down with thin clear fishing line.

All the plants attached to wood are now positioned.

Step 6) Add plants to the substrate. One thing I have learned is that you get a better result using lots of 2-3 plant species than 2-3 plants of a dozen species.
End of tank set up. Note that the left hand side of the tank is all grasses to set off the darker Anubias with rounded leaves. The right side is mainly sword plants.

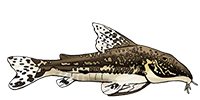
The tank has been up a week and is starting to look pretty good as the plants fill in. Wait as long as possible (yeah, I know it is not easy) to add fish. The plants need as much time as possible to take good root before any fish start messing with them. After two weeks I will add 2-3 Farlowella to start cycling the tank and getting any algae under control.
-Shane


